Load CPDC Sig-Servers (7.5)
The following also applies to Release 7.6, but note the updated Service Pack requirements for 7.6.
1. Introduction:
Fit a 2.5" SATA hard drive (min. 160GB) to the CPDC card. A 250GB (or larger) SSD is recommended:
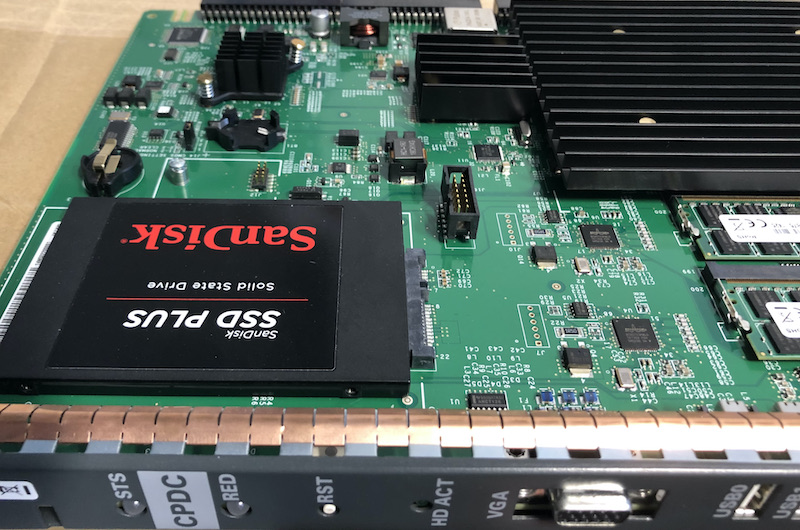
- Place the CPDC in any empty IPE card slot; it only draws power from the back plane, and can be moved later.
- Use a 2 port SDI cable for a TTY connection (9600-8N1), a null-modem is not required. Or, attach a keyboard and monitor.
- Connect the face plate ELAN (or TLAN) ethernet port, a cross-over cable is not required, and configure the host interface.
2. Install Linux base
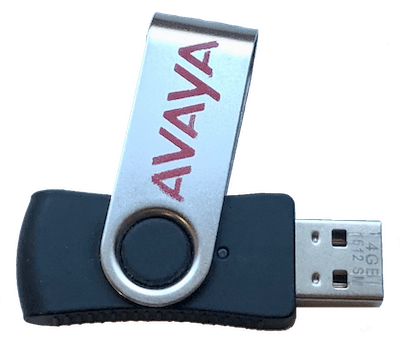
We can load a CPDC either via serial a TTY cable, or via a USB keyboard and VGA monitor connected to the cards faceplate. The bootable Avaya software installation USB Flash Drive is placed in any one of the three faceplate USB slots.
Seat the card, and be ready to Press F to enter the Boot Manager. The option appears on the screen within a few seconds of power, immediately after the option to enter bios configuration, and only briefly!
At the Boot Option Menu, arrow down to select the USB Flash Drive, and press Enter:

If successful, after a short pause, the CS1000 Linux Base System Installer will appear.
You are prompted to enter your console connection: 'com1' (serial TTY), or 'kvm' (USB keyboard and monitor).
If Enter is pressed without input, the system defaults to serial - com1.
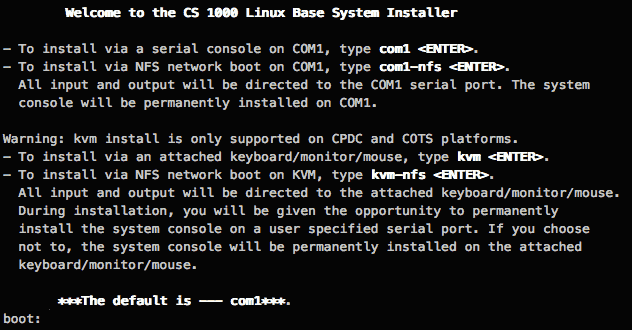
Proceed through all the "are you sure?" prompts, keep pressing enter to proceed....
- On the Base Configuration Data Selection screen, select 1, Normal installation.
- On the Network configuration screen, enter the appropriate IP address and fully qualified domain name (FQDN) information.
- Hostname is the cards unique name, eg: UCM0, SS1, or MAS
- Domain name is the site name, eg: pbxbook.com
- The FQDN is then: ucm0.pbxbook.com - On the GMT Offset Selection screen, enter the time zone code offset that matches your location.
- On the DST Selection screen (Daylight Savings Time) again, make the appropriate selection based on your location.
- Check previously entered information and enter [Y]es to confirm it's correct, or N if changes are needed.
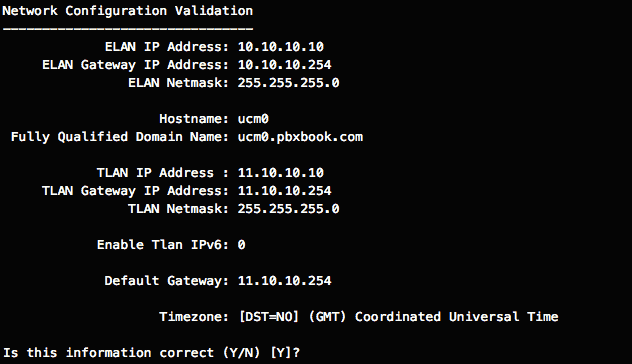
Note: The Network Configuration can be displayed/re-configured later with networkconfig / baseparamsconfig
Confirm that the date and time is correct, and correct it if not - this is important!
- If the date defaults back to 2002 after a power cycle, replace the onboard CR2033 battery.
- Post installation, use datetimeconfig to set the correct time, date to quickly display it from the CLI.
Next set the root and admin2 passwords, which must meet the complexity requirements! WRITE THEM DOWN!
At the Deployment Server screen, enter [Y]es if appropriate. An installation has only ONE deployment server, usually SS0.
This ends the configuration script. The Linux Base System packages will now be automatically installed and configured. This takes approximately 15 minutes.
When the installation process is complete, the card reboots to a FQDN login prompt:

To change the network configuration later, login with admin2, and type: baseparamsconfig. There is no need to re-install.
3. Upload and apply patches:
Use a SFTP file transfer program (winSCP) to upload the Service-updates (patches) and Service-pack. Login with admin2.
The patching directories are as follows, and must be manually navigated to with Goto ➤ Open Directory:
- /var/opt/nortel/patch: upload Service Updates (SUs) here...
- /var/opt/nortel/patch/sp: upload Service Packs (SPs) here...
A tip is to copy the filenames into a text file, so they can be easily pasted into the command line.
Service Updates:
After uploading the SU's, login with admin2 and pload the SU's, one at a time, in the following order:
- cs1000-linuxBase-x.xx.xx.xx-xx
- cs1000-baseWeb-x.xx.xx.xx-xx
- cs1000-patchWeb-x.xx.xx.xx-xx
Use pload <patchname> and pins <handlenumber> for each patch file to load and apply it.
OR, pload <patchname> each patch file, and pins --all to install and apply the SU's all at once (do NOT do this with 7.6).
Service Pack:
The Service pack applies additional patches depending on the deployed applications, and so should be applied AFTER deployment.
Use spload <filename.zip>, followed by spins to install.
The following commands may also be useful for getting a snapshot of server status before and after patching:
pstatandspstatto see which service updates/pack are in service.swVersionShow- Show application versions and deployed applicationsappstart status- Show which applications are runningps -ef- Show the task list.
Install the following Service Updates in the order shown
prior to deploying the Service Pack:
pload cs1000-linuxbase-7.65.16.23-21.i386.000.ntlpload cs1000-Jboss-Quantum-7.65.16.23-5.i386.000.ntlpload cs1000-patchWeb-7.65.16.23-1.i386.000.ntlpload cs1000-dmWeb-7.65.16.23-4.i386.000.ntl
Load the Service Pack AFTER software deployment:
spload SP_7.6_7_1.ntl
4. Password Expiration:
By default the root and admin2 passwords will expire after 90 days, locking out the accounts. We shall set them to never expire (never age). Login as root, and issue the following commands:
# passwd root -x -1        minus one
# passwd admin2 -x -1
The command chage --list root can be used to confirm the password will never expire.
Note: The root user can only login directly, either via the TTY console, or through an attached keyboard and monitor.
4. Local Web Login:
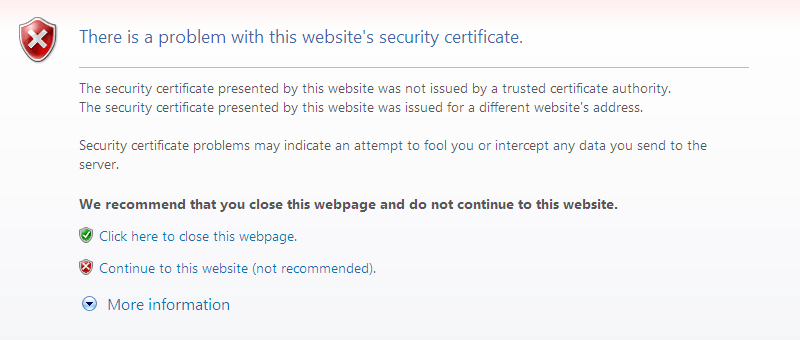
Enter the IP address in a web browser, and after a short delay, the following screen should appear:
After clicking "Continue to this website", the Avaya login screen should appear:
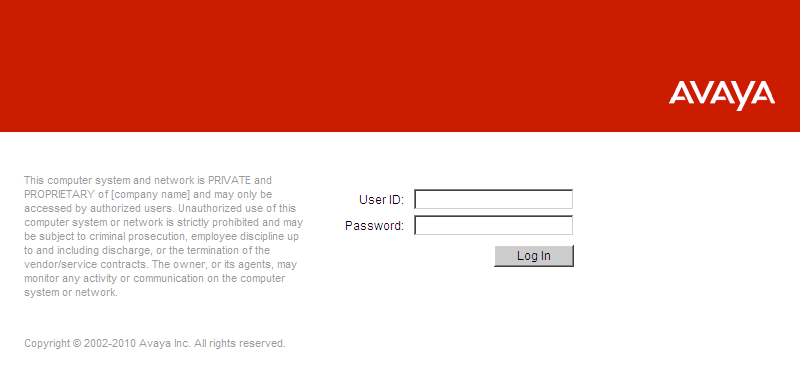
Login with admin2, and continue with Security Configuration.
Typically, there is one primary security server (SS0), an optional backup security server (SS1), and associated member servers (MAS).
Backup and and Member servers will JOIN an established primary security server. You cannot "join" if you're not in the same network.
5. FQDN Login:
Using the IP address directly is for "Local Logon" and security configuration. After this is completed, the FQDN must be used.
The local hosts file must be edited to resolve the FQDN (you may have to "show hidden files/folders" in "Folder Options):
C:\Windows\System32\drivers\etc\
Edit the hosts file, and add an entry for each card deployed, with IP address and FQDN. For example:
10.10.10.10 ss0.pbxbook.com
To modify the hosts file in Windows 7, right click on the Notepad icon and select Run as administrator.
Edit a Mac OS X hosts file with sudo nano /etc/hosts in Terminal, the syntax is the same.
In a browser (IE7), continue with Software Deployment using the FQDN.