Change CPPM Core Side
BUG9896 BOTH side IDs set to:0. Run Install to change the Side
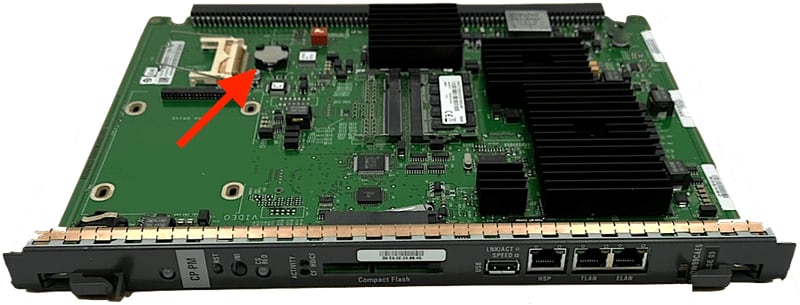
As the message alludes, the only way to correct this is to boot from the install media, goto to the tools menu, and re-enter the CPPM core side and location. Optionally, also replace the DL2032 (or equiv.) CMOS battery to prevent it happening again with the next power outage.
Note: the IPMG will also default to loop 0 shelf 0, so correct this when changing the side.
This can also be changed later in LD 117 with: CHG LCL <Loop> <Shelf>
There should be no loss of service with this procedure:
- LD 135:
SCPU, if needed, to make the correct Core 0 the active core - Boot the old Core 1 CPPM card from the Install RMD (same version)
- Proceed with the upgrade? (Y/N) y for yes - twice
- From the MAIN MENU: <t> - To Tools Menu.
- From the TOOLS MENU: <w> - To Set the CPPM Core Location (Side/Loop/Shelf) Information.
- Enter the Side and IPMG info, and confirm
- From the TOOLS MENU: <m> - To return to the Main Menu.
- From the MAIN MENU: <q> - Quit.
- Confirm, <y> - Yes, quit, then enter: <a> - Reboot the system.
- Remove the Install RMD, and re-insert the backup (EDD) RMD
Core 1 should now boot normally and 'join' Core 0.
Check the system is redundant in LD 135: STAT CPU
TTY output example:
With the correct installation RMD in the face plate, press cards RST button, and be ready to press F:
Polling Hard Drive and Compact Flash Locations
+------------------------------------------------------------------------------+
|          System BIOS Configuration, (C) 2005 General Software, Inc.          |
+---------------------------------------+--------------------------------------+
| System CPU           : Pentium M      | Low Memory           : 632KB         |
| Coprocessor          : Enabled        | Extended Memory      : 1011MB        |
| Ide 0 Type           : 3              | Serial Ports 1-2     : 03F8 02F8     |
| Ide 1 Type           : 3              | ROM Shadowing        : Enabled       |
| Ide 2 Type           : 3              | BIOS Version         : NTDU74AA 18   |
+---------------------------------------+--------------------------------------+

Press F to force board to boot from faceplate drive.
..............
Press F. The question is asked again, so watch the screen for the following:
/boot/  - Volume is OK
Found /boot/nvram.sys
Selecting nvram file from 2 sources

Read boot parameters from:

F: Faceplate compact flash
H: Hard Drive
 8 [H] f
Reading boot parameters from /cf2/nvram.sys
Press f again. Eventually, the following is displayed:
        Communication Server 1000 Software/Database/BOOTROM RMD Install Tool
        ====================================================================

                                                          AVAYA

                                            Communication Server 1000 Software

                                                  Install Tool version 29

                                                    Copyright 2005 - 2012

        Please press <CR> when ready ...
We're ready, and want to proceed with the upgrade...
*****************************************************************
 WARNING:

 This software does not support TNs configured on PE/EPE
 shelves. Upgrading to this software release will permanently
 disable all TNs configured on PE/EPE and will not allow new
 TNs to be configured.

 Proceed with the upgrade? (Y/N) y

*****************************************************************
 WARNING:

 Upgrading from pre-Release 4.5 software to Release 4.5 or higher
 will result in the system PDT passwords being reset to default.

 Proceed with the upgrade? (Y/N) y
And finally, the MAIN MENU appears.
        Communication Server 1000 Software/Database/BOOTROM RMD Install Tool
        ====================================================================

                               M A I N    M E N U

        The Software Installation Tool will install or upgrade
        Communication Server 1000 Software, Database and the CP-BOOTROM.

        You will be prompted throughout the installation and given the
        opportunity to quit at any time.

        Please enter:
<CR> -> <u> - To Install Menu.
        <t> - To Tools Menu.
        <q> - Quit.

        Enter choice> t
We want to go to the TOOLS MENU.
        Communication Server 1000 Software/Database/BOOTROM RMD Install Tool
        ====================================================================

                               T O O L S   M E N U

        This is the Tools Menu for Install. You can select the tool that
        is appropriate.  Please select one of the options below.


        Please enter:
<CR> -> <a> - To set the system date and time.
        <b> - To partition the Fixed Media Device.
        <c> - To display the partition size of Fixed Media Device.
        <d> - To reload default accounts.
        <g> - To print System S/W content on Removable Media Device.
        <h> - To print Keycode content.
        <i> - To print Security Device content.
        <j> - To Check the customer specific System S/W on the RMD.
        <k> - To manually create Keycode on Removable Media Device.
        <r> - To install Keycode only.
        <s> - To archive existing database.
        <t> - To replace CPU board BIOS.
        <v> - To display media vendor information.
        <w> - To Set the CPPM Core Location (Side/Loop/Shelf) Information.
        <m> - To return to the Main Menu.

        Enter choice> w
Press w to 'Set the CPPM Core Location'
        Communication Server 1000 Software/Database/BOOTROM RMD Install Tool
        ====================================================================

        This CS 1000 Call Processor is set to side 0

        Please confirm that the side information is correct.


        Please enter:
<CR> -> <y> - Yes, the side information is correct.
        <n> - No, the side information is incorrect. Go on to Side Setting Menu.

        Enter choice> n
Set Side to 1
        Communication Server 1000 Software/Database/BOOTROM RMD Install Tool
        ====================================================================

        Enter Call Processor side <0 or 1> : 1

        Call Processor is set to side 1. Please confirm this is correct.


        Please enter:
<CR> -> <y> - Yes, the side information is correct.
        <n> - No, the side information is incorrect.

        Enter choice> y
On to IPMG location:
        Communication Server 1000 Software/Database/BOOTROM RMD Install Tool
        ====================================================================

        This CS 1000 Call Processor is currently located in the IPMG
        configured as:

        loop   0
        shelf  0

        Please confirm that the IPMG loop and shelf information is correct.

        Note: If the IPMG has not been configured yet, the IPMG loop and
              shelf information can be left as the current value. To update
              the loop and the shelf information later, use OVL117.


        Please enter:
<CR> -> <y> - Yes, the IPMG loop and shelf information is correct.
        <n> - No, the IPMG loop and shelf information is incorrect.
               Go on to Loop/Shelf Setting Menu.

        Enter choice> n
Enter the card location (loop/shelf)
        Communication Server 1000 Software/Database/BOOTROM RMD Install Tool
        ====================================================================
        Enter the Loop that the Call Processor is in <0-252>   : 0

        Enter the Shelf that the Call Processor is in <0 or 1> : 1

        loop   0
        shelf  1


        Please confirm this information is correct.


        Please enter:
<CR> -> <y> - Yes, the loop and shelf information is correct
        <n> - No, the loop and shelf information is incorrect.

        Enter choice> y
When correct, it returns to the TOOLS MENU
Enter m to return to the MAIN MENU
        Communication Server 1000 Software/Database/BOOTROM RMD Install Tool
        ====================================================================

                               T O O L S   M E N U

        This is the Tools Menu for Install. You can select the tool that
        is appropriate.  Please select one of the options below.


        Please enter:
<CR> -> <a> - To set the system date and time.
        <b> - To partition the Fixed Media Device.
        <c> - To display the partition size of Fixed Media Device.
        <d> - To reload default accounts.
        <g> - To print System S/W content on Removable Media Device.
        <h> - To print Keycode content.
        <i> - To print Security Device content.
        <j> - To Check the customer specific System S/W on the RMD.
        <k> - To manually create Keycode on Removable Media Device.
        <r> - To install Keycode only.
        <s> - To archive existing database.
        <t> - To replace CPU board BIOS.
        <v> - To display media vendor information.
        <w> - To Set the CPPM Core Location (Side/Loop/Shelf) Information.
        <m> - To return to the Main Menu.

        Enter choice> m
Enter q to quit
        Communication Server 1000 Software/Database/BOOTROM RMD Install Tool
        ====================================================================

                               M A I N    M E N U

        The Software Installation Tool will install or upgrade
        Communication Server 1000 Software, Database and the CP-BOOTROM.

        You will be prompted throughout the installation and given the
        opportunity to quit at any time.

        Please enter:
<CR> -> <u> - To Install Menu.
        <t> - To Tools Menu.
        <q> - Quit.

        Enter choice> q
Enter y to confirm
        Communication Server 1000 Software/Database/BOOTROM RMD Install Tool
        ====================================================================

        You selected to quit. Please confirm.

        Please enter:
<CR> -> <y> - Yes, quit.
        <n> - No, DON'T quit.

        Enter choice> y
Enter a to reboot
        Communication Server 1000 Software/Database/BOOTROM RMD Install Tool
        ====================================================================

        You selected to quit the Install Tool.
        You may reboot the system or return to the Main Menu.
        -----------------------------------
        DO NOT REBOOT USING RESET BUTTON!!!
        -----------------------------------

        Please enter:
<CR> -> <a> - Reboot the system.
        <m> - Return to the Main Menu.

        Enter choice> a


>Rebooting system ...