Configuring DID E1/PRI
Use the following slides as a guide for setting up a EURO ISDN PRI with DID.
- Line settings are generally not mergeable, changes require a reboot.
- The number of PRI channels cannot exceed the keycode allocation.
- Direct Short Code access works, but Configuring ARS is preferable.
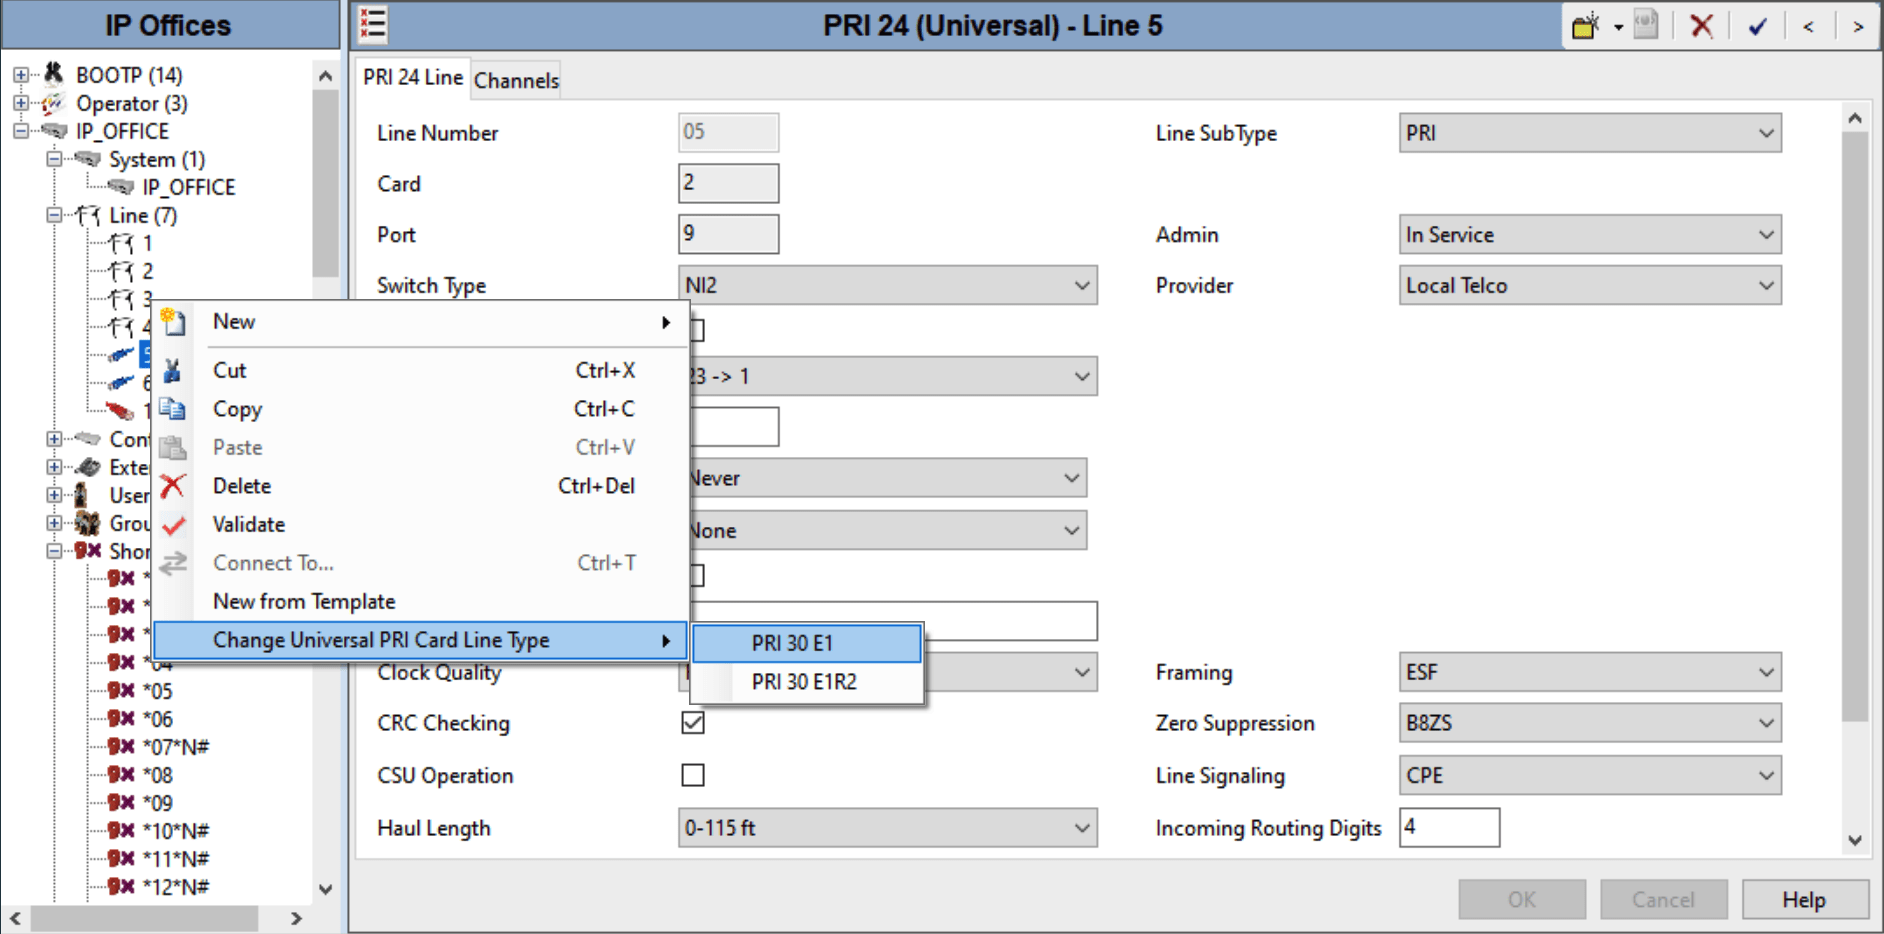
1. Right-Click the PRI Line, and set it to PRI30 E1
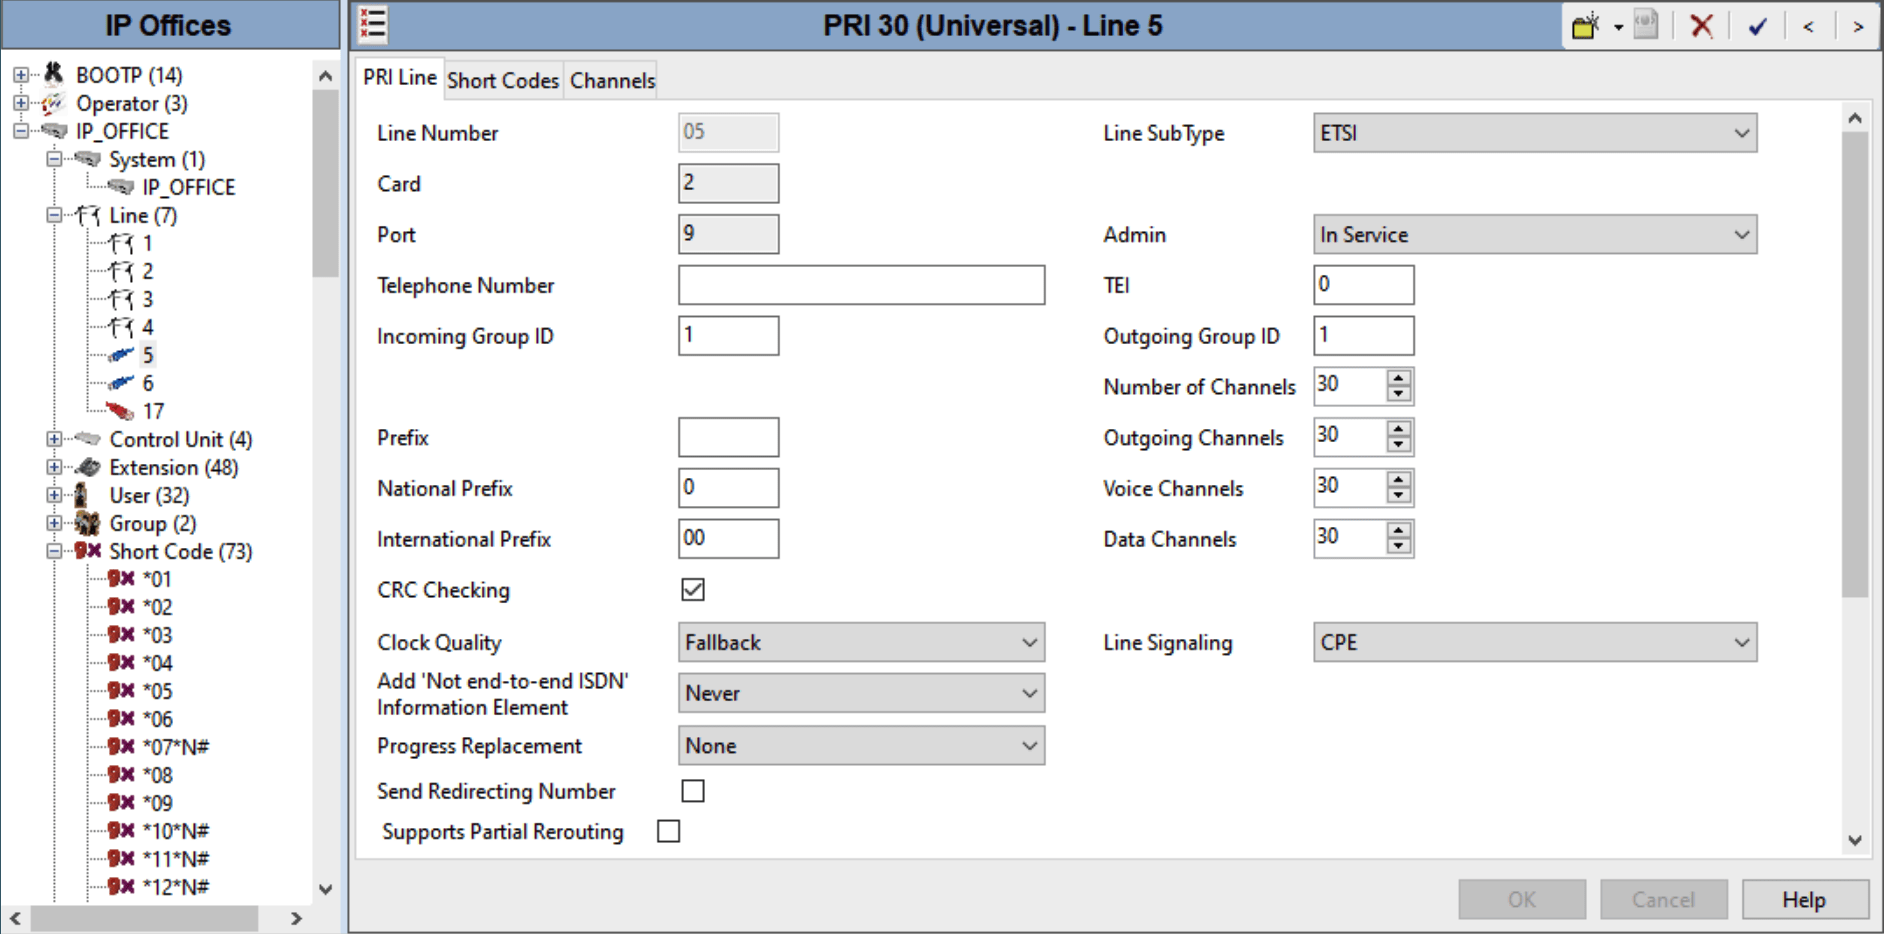
2. Line SubType: ETSI, CRC Checking must match provider, enter Incoming & Outgoing ID's
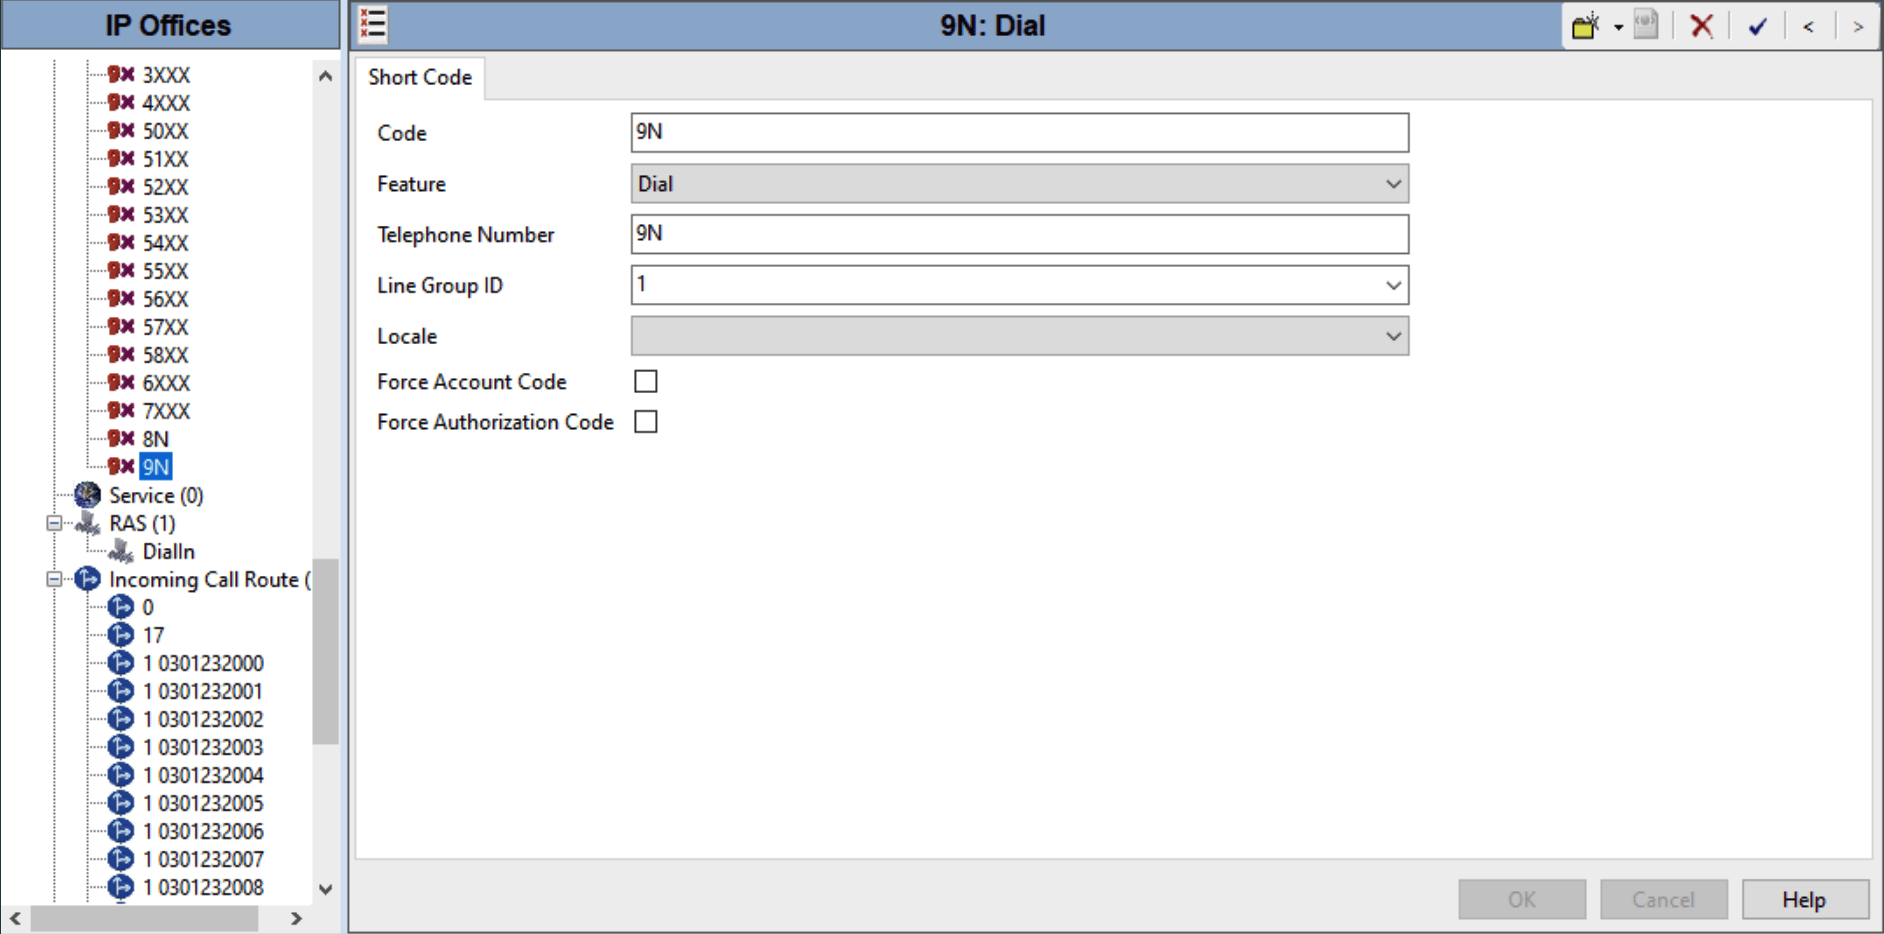
3. Add a Shortcode for "9N" pointing to the Line Group ID
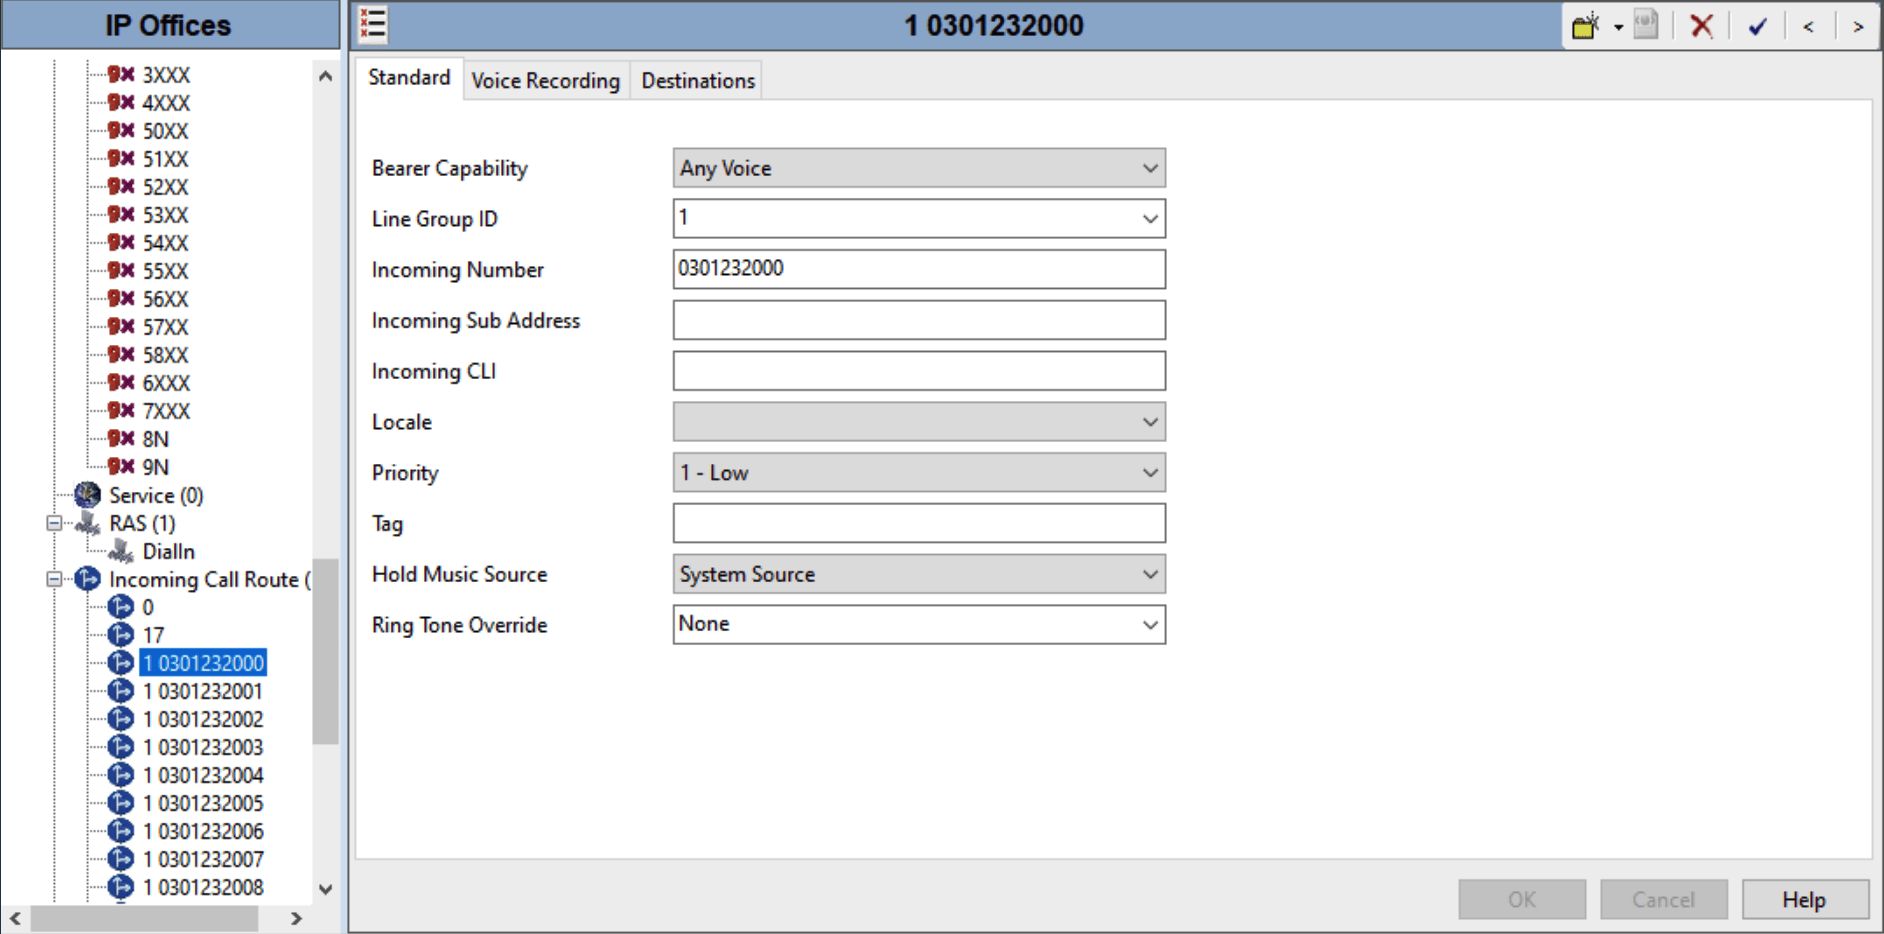
4. For the Incoming ID, add a new entry with received digits
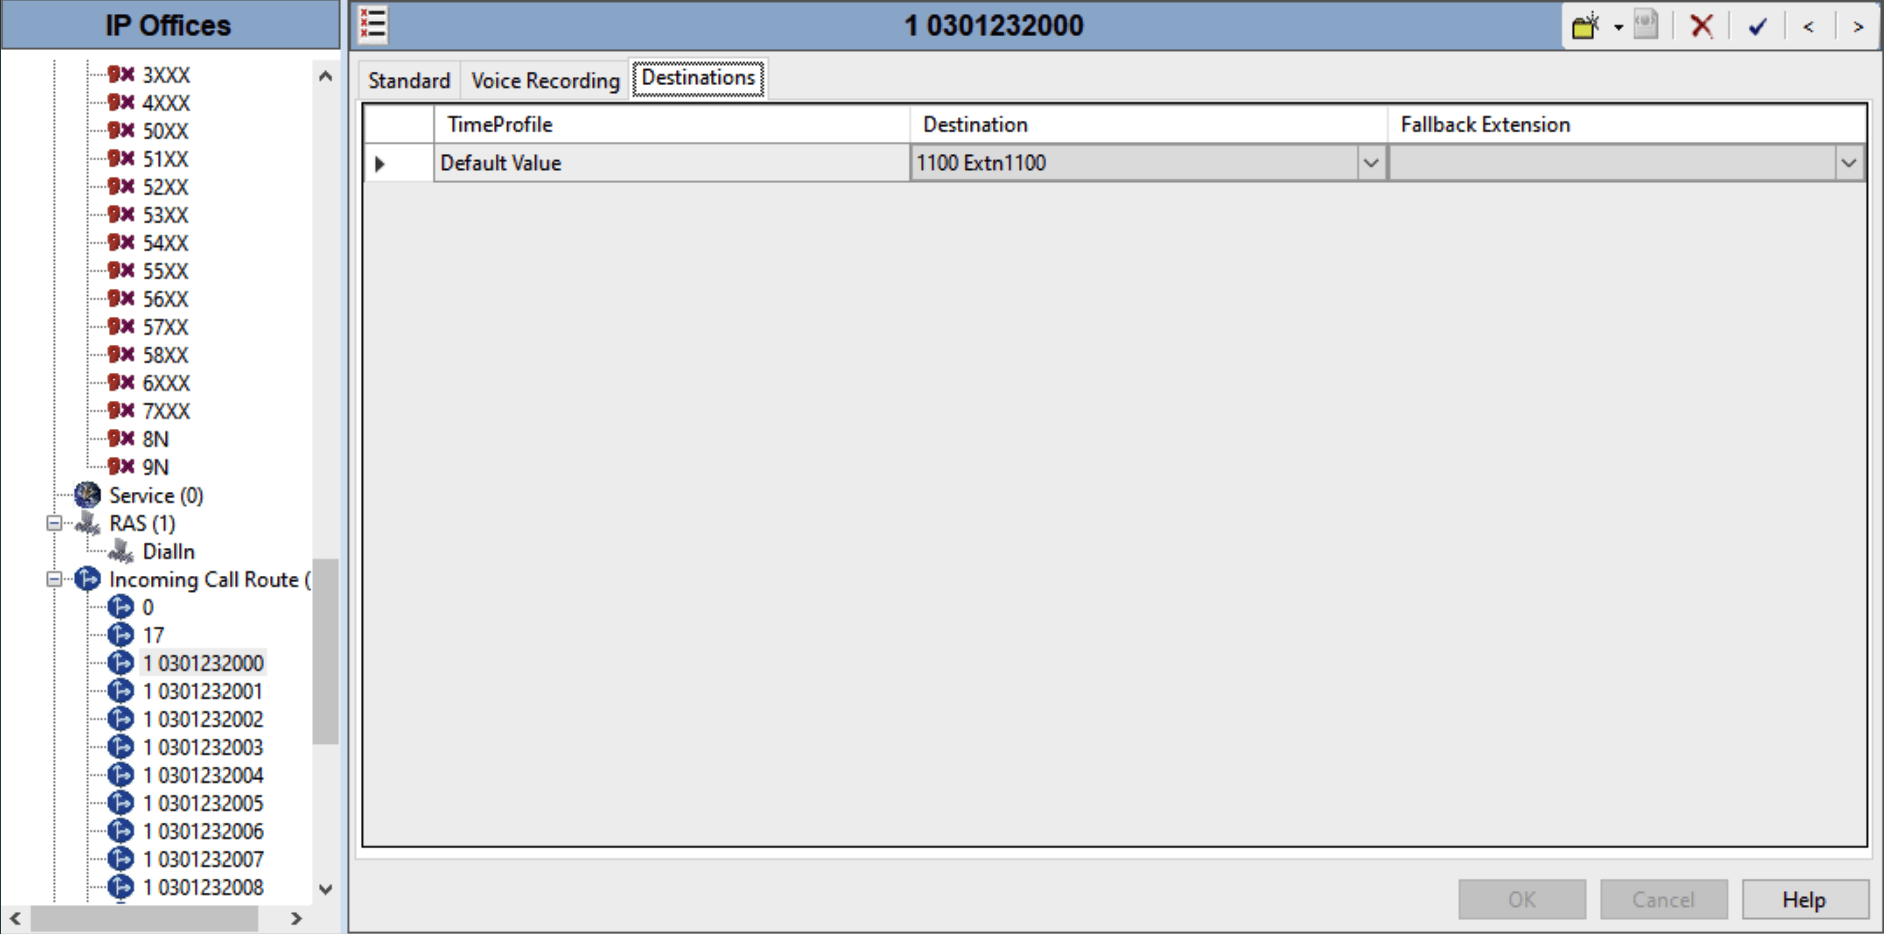
5. Set the destination tab extension for this entry