Dutchtronix AVR Scope Clock
This Scope Clock was designed by Jan de Rie, and built from a kit available from his website.
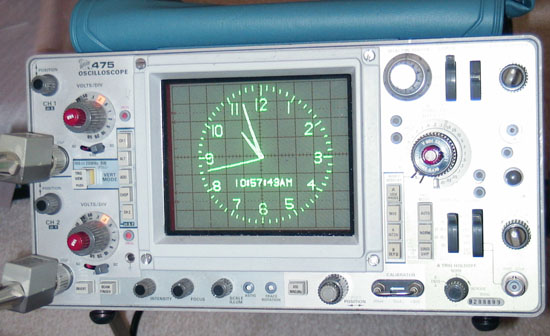
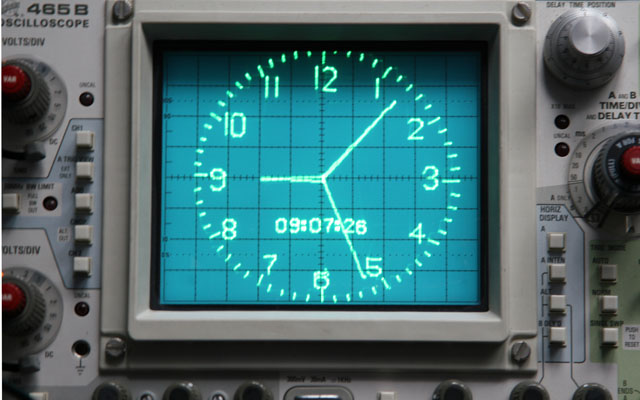
The clock, which connects to any analog oscillope (in X-Y mode) using regular 10x probes, produces the clock face and curent time display as shown above. A Menu Mode and an RS232 interface allow the user to set the time, date, and or other options. The time and date is retained with a RTC and battery when power is removed.
Jan has a ton of documentation on his website!
Below are some photo's and notes from the kit I built
Click on a picture to open it in a Popup window.
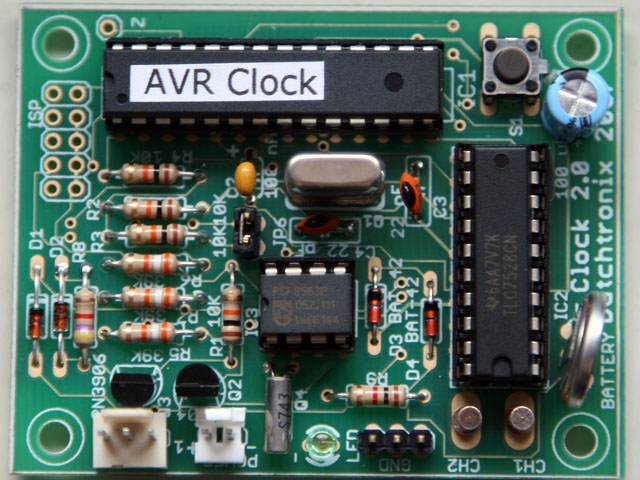 |
The finished PCB. The circuit uses a ATmega168 microcontroller, and a TLC7528 DAC. There is also a PCF8563 real time clock with battery. The clock requires 5V power on the 2 prong header. The oscilloscope X-Y outputs are bottom right. Pressing S1 puts the clock into Menu Mode where various settings can be adjusted. | ||||||||
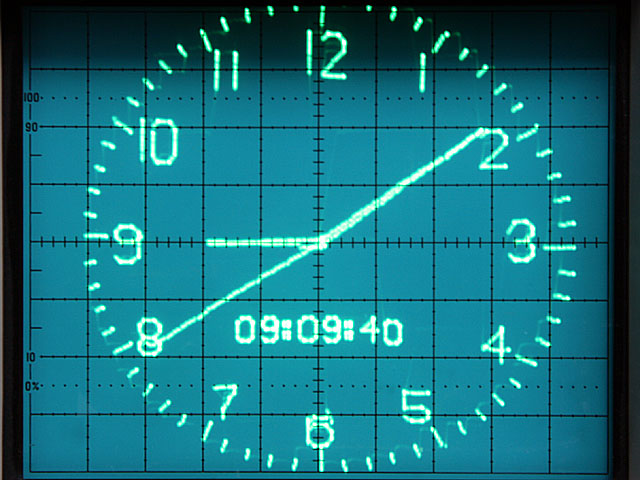 |
And this is the clock face. There are several display options (selected in Menu Mode), such as analog only, or showing fewer numerals. A Demo mode (short push, long push, short push) cycles through all the options. At the end of the demo, the clock automatically restarts in normal operation mode. | ||||||||
 |
A short push of S1 will enter the Menu Mode, and there are options galore! You can even make the clock run backwards. The option being updated/selected is flashing. Move to the next option by a long push. The first two options (BOOT and DEMO) are activation options. A short push will activate them. The other options are selection values. A short push will show the next selection value. Moving to the next option (using a long push) when the selection value has changed, will activate the selected value and the clock will leave the menu mode. | ||||||||
 |
The clock can also be operated through the RS-232 serial port interface, using a PC or any other terminal device. A cable is required consisting of a female DB-9 connector and the 3-pin connector included with the clock kit.
|
||||||||
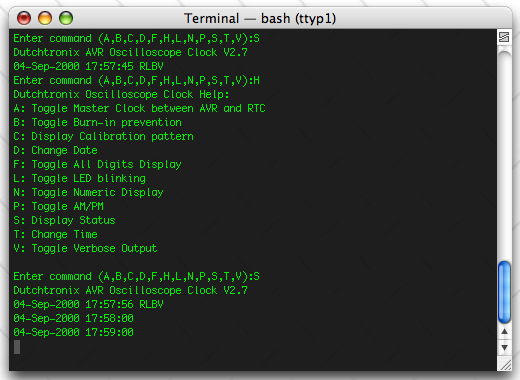 |
Use a terminal session set to 19200,8,n,1 - If the connection is good, the AVR clock will display a sign-on message when it starts. Commands are prefixed with "X" - "XH" will display help, or "XS" the clock status. In verbose mode the clock transmits the current time every minute. | ||||||||
 |
Another picture of the nice display produced with X10 probes. 1X probes (or BNC cables) are not recommended since their capacitance loads the signal down to the point at which the retrace vectors are visible. This effect can be minimized by adding (2K5R or 3K3R) load resistors. | ||||||||
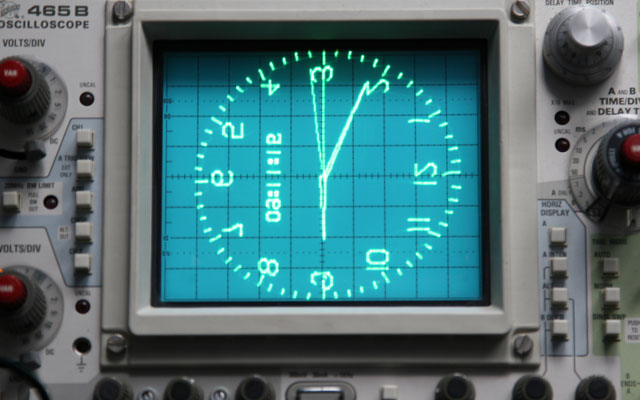 |
X-Y connected the wrong way round! Most scopes define CH1 and the X axis and CH2 as the Y axis. Some, for example the Tektronix 485, reverse this convention. As a result, you will need to swap the probes. |