Managing Backups
This document covers how backups for CUCM and CUC are configured and managed.
Backups devices and schedules should be configured on the CUCM publisher, and CUC primary. In this example, there are two back up devices shown, eg: WIN1 and MGMT-PC. Any backup device will need to run a SFTP Server application (eg, Solar Winds).
CUCM and CUC Back-Up Configuration
Adding the Backup Devices
- Verify the following before continuing:
- An SFTP server is Active on the network
- SFTP folders match the path name to be used
- Username and password are set up and known
- Time and Date on the SFTP server are correct
- Firewall allows SFTP access (TCP port 22)
NOTE: Backups are configured on the CUCM publisher, and CUC primary. In this example, there are two back up devices: WIN1 and MGMT-PC. Both devices use Solar Winds SFTP Server. Both devices need to be configured on CUCM and CUC respectively along with their respective enabled schedules. Reference the below configuration for the standard configuration. The following applies to both CUCM and CUC...
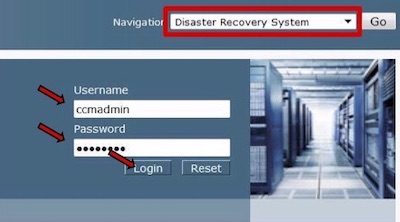
- Using browser: Log into CUC: Disaster Recovery System. Username: ccmadmin (CUCM), cucadmin (CUC)
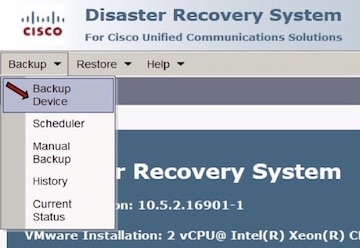
- Go to: Backup ➤ Backup Device
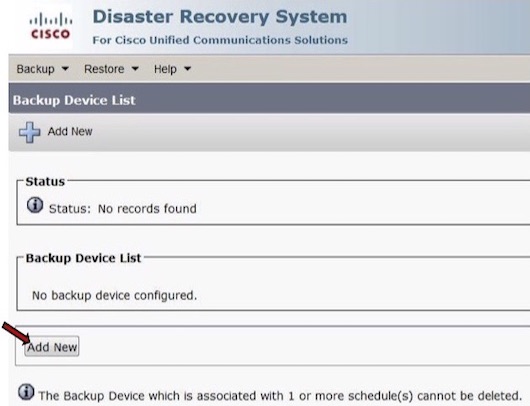
- Click: Add New
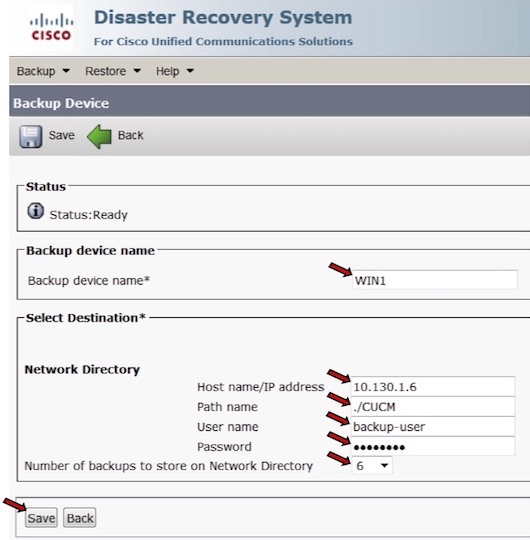
- Backup device name: WIN1 or MGMT-PC
- Network Directory
- Server name, or IP address
- Path name: (Example) ./CUCM or ./CUC
- User name: (as configured in SFTP server)
- Password: (Password)
- Number of backups to keep: 6
- Click: Save
NOTE: Status field at the top should indicate: Updated successful. If not, troubleshoot! - Click: Save
- Go to: Backup ➤ Backup Device and verify that there are now two devices configured. (Example below taken from CUCM)
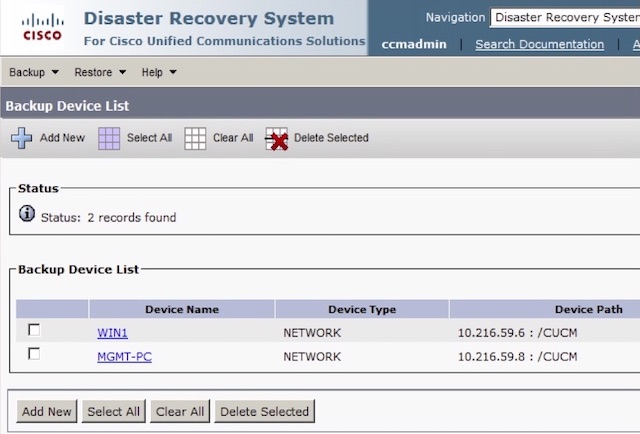
Manual Back-Up Server Check
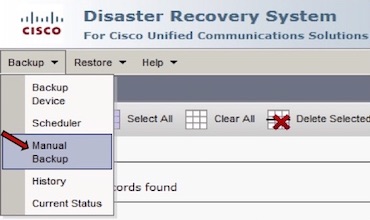
- Go to: Backup ➤ Manual Backup
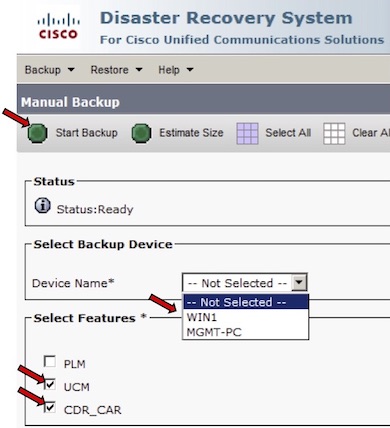
- Device Name: (Example) WIN1 or MGMT-PC
- Check: (Example) UCM, CDR_CAR
- Click: Start Backup
- DRS backup message, Click: OK
- Verify Backup details start to populate on both CUCM and Solar Winds server. If not troubleshoot
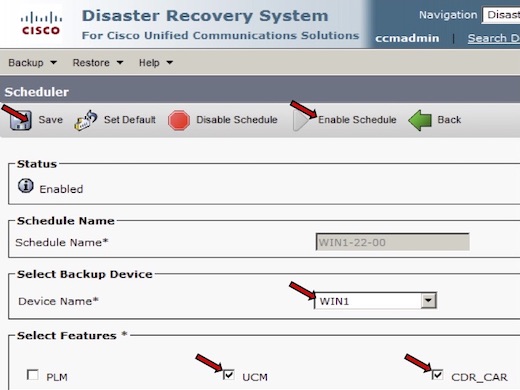
Adding the Schedule for CUCM1
- Go to: Backup ➤ Scheduler
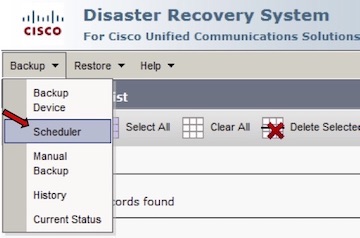
- Click: Add New
- Schedule Name: (Example) WIN1-22-00 or MGMT-22-30
- Device Name: (Example) WIN1 or MGMT-PC
- Select Features:
- UCM
- CDR_CAR
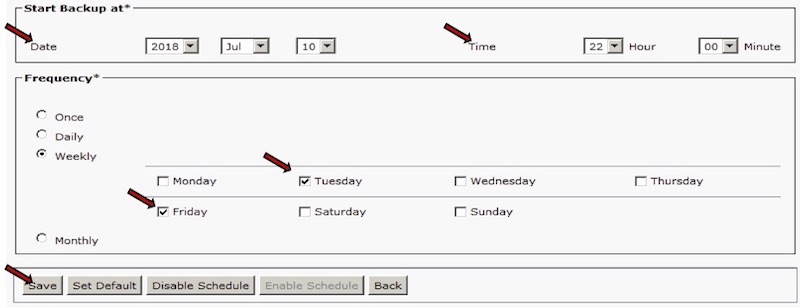
- Start Backup at: enter date and time
- Frequency: select how often
- Click: Save
- DRS Backup message: OK
- Click: Enable Schedule (shown in picture above)
NOTE: Repeat these steps for Second back-up device (if required).
Adding the Schedule for CUC1
- Go to: Backup ➤ Scheduler
- Click: Add New
- Schedule Name: (Example) WIN1-22-30 or MGMT-22-00
- Device Name: (Example) WIN1 or MGMT-PC
- Select Features:
- CONNECTION_GREETINGS_VOICENAMES
- CONNECTION_HTML_NOTIFICATION
- CONNECTION_DATABASE
- CONNECTION_MESSAGES_UNITYBXDB1
- CUC
- Start Backup at: (Tomorrow’s date)
- Time: (WIN1 22:30) or (MGMT 22:00)
- Frequency: Daily
- Click: Save
- DRS Backup message: OK
- Click: Enable Schedule
NOTE: Repeat these steps for Second back-up device (if required).
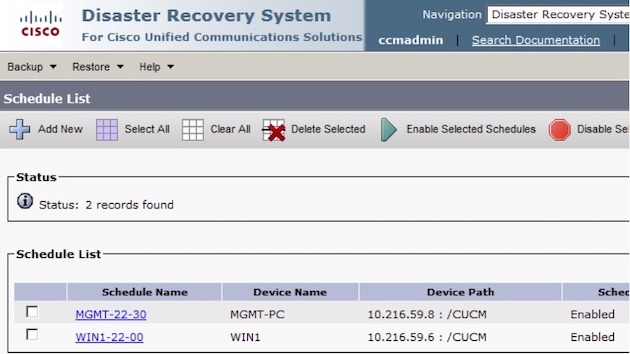
Completed/Enabled schedules for CUCM shown below:
Restoring a Back-Up
- Go to: Restore ➤ Restore Wizard
- Device Name: (Example) WIN1
- Click: Next
- Select Backup File: (use latest date)
- Click: Next
- Check: (All Features available)
- Click: Next
- Select: One-Step Restore to restore the whole cluster or manually check the back-up type you need