Import Multiple Users
Unity's Bulk Administration Tool (BAT) can import a text file with comma-separated values (CSV) to create multiple mailboxes at once. This is extremely handy if upgrading from another Voicemail system, such as CallPilot. How easy this is depends on your Excel/Numbers and Copy/Paste dexterity, but it's worth spending some time on it, as a bulk import is huge time saver when it works!
Get some Data!
The source could be an extension list, or an export from another system. Name & extension is enough to start with. Fields must be plain text, and comma separated which may require some preliminary work in a text editor. Open the CSV file in Excel or Numbers, and make sure it looks good, with the correct data in the correct columns.
Eg, mailbox users exported from CallPilot, opened in Excel or Numbers:
| 1 | 3562 | 3562 | Brown | Anita | Regular User | Local User | 1 |
| 2 | 4587 | 4587 | Johnson | Anne | Regular User | Local User | 1 |
| 3 | 3785 | 3785 | Simpson | Claire | Regular User | Local User | 1 |
| 4 | 4366 | 4366 | King | Mike | Regular User | Local User | 1 |
| 5 | 3111 | 3111 | King | Mike | Regular User | Local User | 1 |
| 6 | 3034 | 3034 | Johnson | Claire | Regular User | Local User | 1 |
Converting:
At a bare minimum, Unity requires 7 fields:
| Alias | DisplayName | FirstName | LastName | TemplateAlias | Mailbox | ListInDirectory |
|---|
Therefore, we need to edit the columns and fields to look something like the following...
With some column duplication, fill down, and 'Find & Replace', this actually isn't too hard!
| Alias | DisplayName | FirstName | LastName | TemplateAlias | Mailbox | ListInDirectory |
|---|---|---|---|---|---|---|
| AnitaBrown | Anita Brown | Anita | Brown | VoiceMailUserTemplate | 3562 | 1 |
| AnneJohnson | Anne Johnson | Anne | Johnson | VoiceMailUserTemplate | 4587 | 1 |
| ClaireSimpson | Claire Simpson | Claire | Simpson | VoiceMailUserTemplate | 3785 | 1 |
| MikeKing | Mike King | Mike | King | VoiceMailUserTemplate | 4366 | 1 |
| MikeKing | Mike King | Mike | King | VoiceMailUserTemplate | 3111 | 1 |
| ClaireJohnson | Claire Johnson | Claire | Johnson | VoiceMailUserTemplate | 3034 | 1 |
Export the final table as a CSV (comma separated values) file: File ➤ Export to ➤ CSV...
It should then look as follows when opened in a text editor, where any final tweaking can be done (if necessary).
Ensure that the first row contains the column headings, these are the minimum headings required for Unity Mail:
Note that Numbers will separate values with Semi-colons if the decimal separator is a comma (eg, in Europe).
This can be fixed by changing your Region to UK/US in System Preferences, or with 'Find & Replace' in the text editor.
Importing:
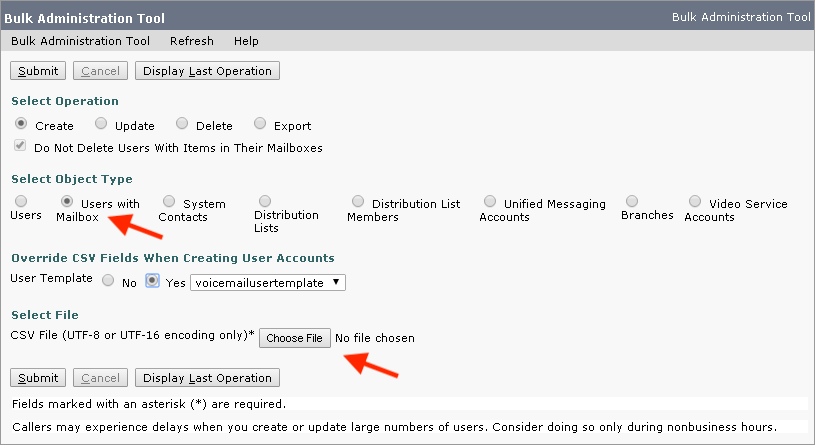
In Unity, from the left menu select: Tools ➤ Bulk Administration Tool, choose your CSV file, and click Submit

If an import fails, open the the ''failed objects report file' by clicking the link. Make the necessary changes, and try again.
Rules:
- The first row in your CSV file must contain column headings
- Ensure that commas separate the data in each row in your CSV file
- Although the data must be arranged in the same order as the column heading, the column order is unimportant
- If the CSV file includes a column that you want BAT to ignore, use the column heading "Junk"
- If any data includes a space, quotes, or commas, contain it within quotes *. Your data should not include double-quotes
- Column headings are not case sensitive, but they must be spelled as indicated in Required and Optional CSV Fields section
* Works without quotes in Unity, but may cause problems interacting with external servers, so be aware.